Activate GitLab EE with a license (PREMIUM SELF)
To activate all GitLab Enterprise Edition (EE) functionality, you need to upload
a license. It's only possible to activate GitLab Enterprise Edition, so first verify which edition
you are running. To verify, sign in to GitLab and browse to /help. The GitLab edition and version
are listed at the top of the Help page.
If you are running GitLab Community Edition (CE), upgrade your installation to GitLab Enterprise Edition (EE). For more details, see Upgrading between editions. If you have questions or need assistance upgrading from GitLab CE to EE please contact GitLab Support.
The license is a base64-encoded ASCII text file with a .gitlab-license
extension. You can obtain the file by purchasing a license
or by signing up for a free trial.
After you've received your license from GitLab Inc., you can upload it by signing into your GitLab instance as an admin or adding it at installation time.
As of GitLab Enterprise Edition 9.4.0, a newly-installed instance without an uploaded license only has the Free features active. A trial license activates all Ultimate features, but after the trial expires, some functionality is locked.
Uploading your license
The first time you visit your GitLab EE installation signed in as an administrator, you should see a note urging you to upload a license with a link that takes you to Admin Area > License.
Otherwise, you can:
-
Navigate manually to the Admin Area by selecting the wrench ({admin}) icon in the top menu.
-
Navigate to the License tab, and select Upload New License.
-
If you've received a
.gitlab-licensefile:- Download the license file to your local machine.
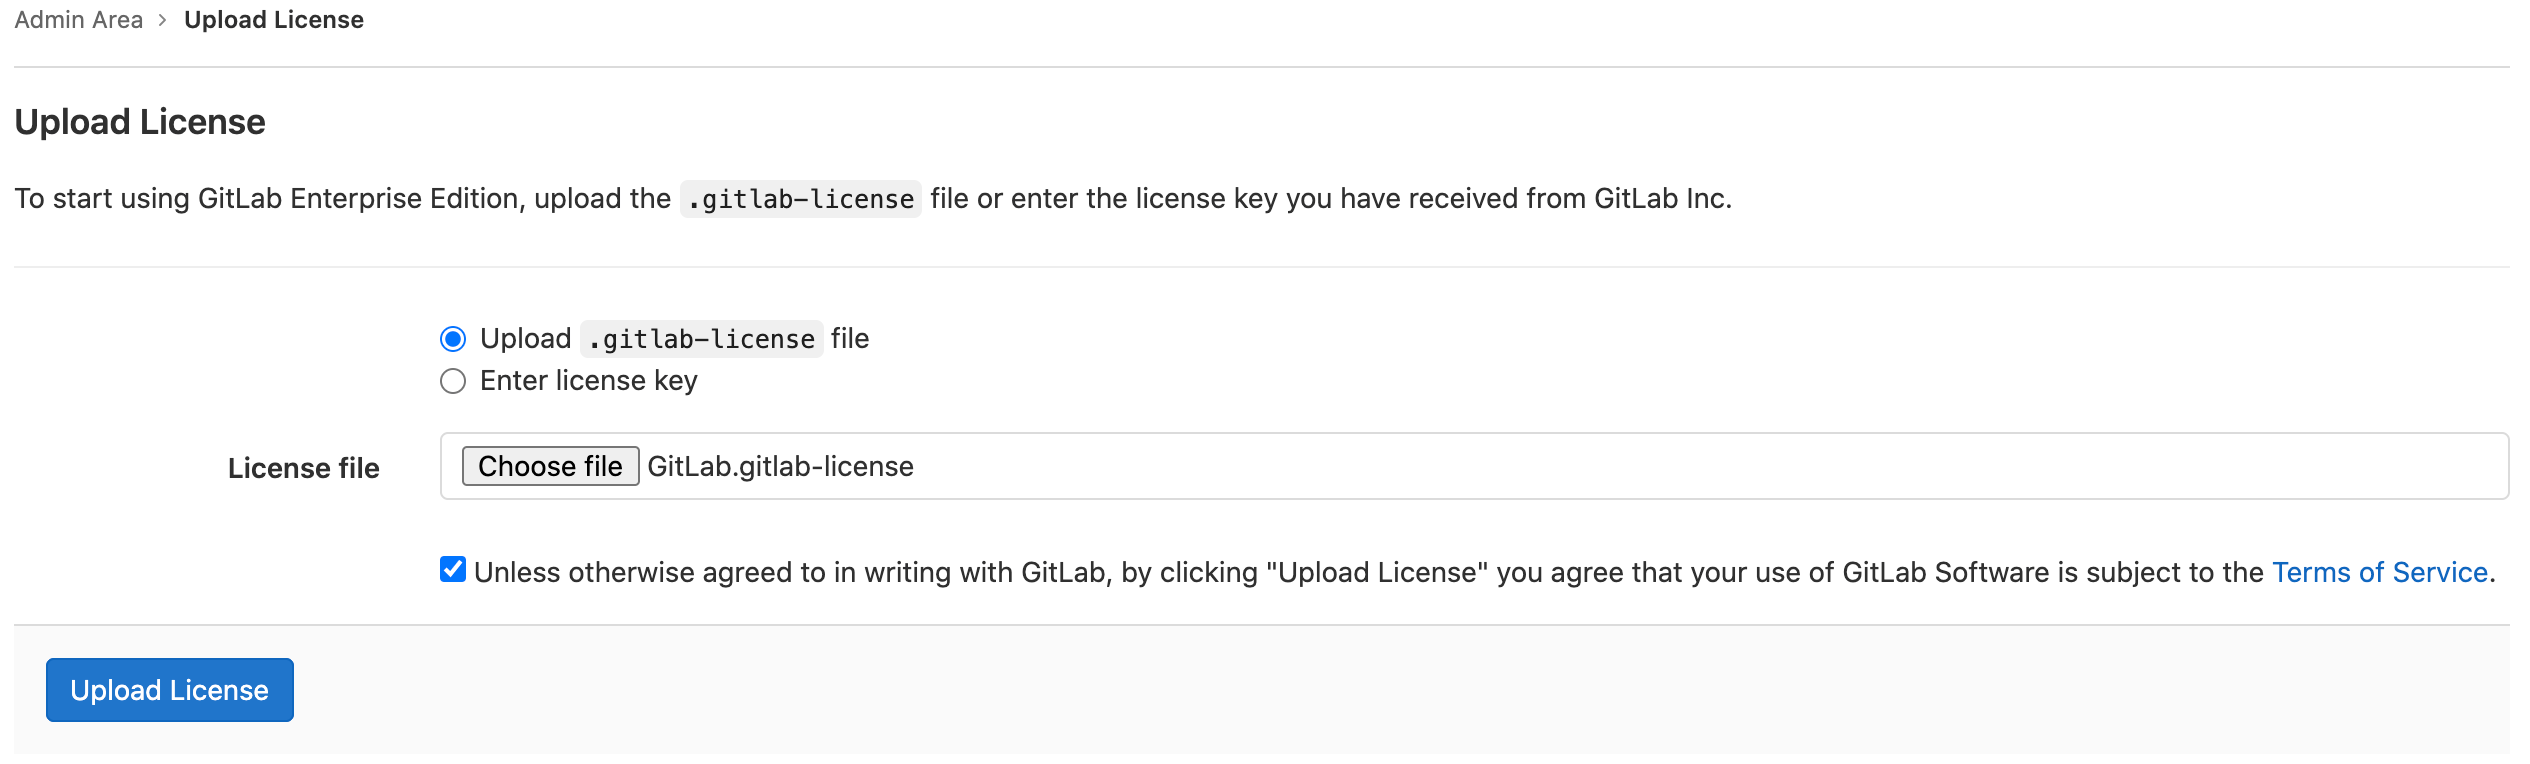
- Select Upload
.gitlab-licensefile. - Select Choose file and select the license file.
In this example the license file is named
GitLab.gitlab-license. - Select the Terms of Service checkbox.
- Select Upload License.

-
If you've received your license as plain text:
- Select Enter license key.
- Copy the license and paste it into the License key field.
- Select the Terms of Service checkbox.
- Select Upload License.
-
Add your license at install time
A license can be automatically imported at install time by placing a file named
Gitlab.gitlab-license in /etc/gitlab/ for Omnibus GitLab, or config/ for source installations.
You can also specify a custom location and filename for the license:
-
Source installations should set the
GITLAB_LICENSE_FILEenvironment variable with the path to a valid GitLab Enterprise Edition license.export GITLAB_LICENSE_FILE="/path/to/license/file" -
Omnibus GitLab installations should add this entry to
gitlab.rb:gitlab_rails['initial_license_file'] = "/path/to/license/file"
WARNING: These methods only add a license at the time of installation. Use the {admin} Admin Area in the web user interface to renew or upgrade licenses.
After the license is uploaded, all GitLab Enterprise Edition functionality is active until the end of the license period. When that period ends, the instance will fall back to Free-only functionality.
You can review the license details at any time by going to Admin Area > License.
Notification before the license expires
One month before the license expires, a message informing about the expiration date is displayed to GitLab administrators. Make sure that you update your license, otherwise you miss all the paid features if your license expires.
What happens when your license expires
When your license expires, GitLab locks down features, like Git pushes and issue creation. Then, your instance becomes read-only and an expiration message is displayed to all administrators.
For GitLab self-managed instances, you have a 14-day grace period before this occurs.
- To resume functionality, upload a new license.
- To fall back to Free features, delete the expired license.
Remove a license
To remove a license from a self-managed instance:
- In the top navigation bar, click the {admin} wrench icon to navigate to the Admin Area.
- Click License in the left sidebar.
- Click Remove License.
License history
You can upload and view more than one license, but only the latest license in the current date range is used as the active license. When you upload a future-dated license, it doesn't take effect until its applicable date.
NOTE: In GitLab 13.6 and earlier, a notification banner about an expiring license may continue to be displayed even after a new license has been uploaded. This happens when the newly uploaded license's start date is in the future and the expiring one is still active. The banner disappears after the new license becomes active.
Troubleshooting
There is no License tab in the Admin Area
If you originally installed Community Edition rather than Enterprise Edition you must upgrade to Enterprise Edition before uploading your license.
GitLab.com users can't upload and use a self-managed license. If you want to use paid features on GitLab.com, you can purchase a separate subscription.
Users exceed license limit upon renewal
If you've added new users to your GitLab instance prior to renewal, you may need to purchase additional seats to cover those users. If this is the case, and a license without enough users is uploaded, GitLab displays a message prompting you to purchase additional users. More information on how to determine the required number of users and how to add additional seats can be found in the licensing FAQ.